3. UPLOAD
PREPARATION TIME!
It is definitely worth making some notes and giving some consideration to the best wording you to use for your Amazon listing ahead of time so that when you are ready to upload your book you can simply copy and paste the information.
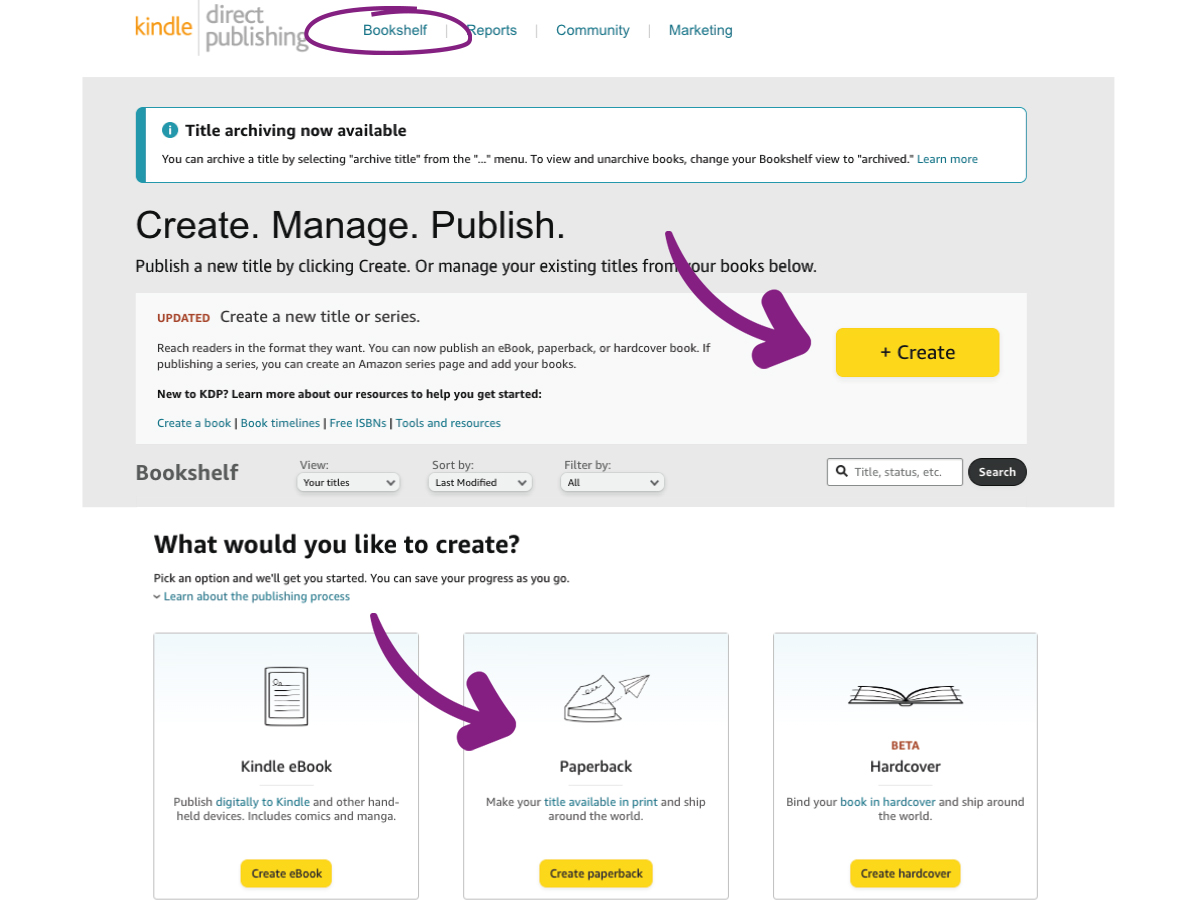
Log in to your Amazon KDP account and go to your “Bookshelf” as shown on the image. You can then select and click on the “Create” button.
This will prompt you to choose what you wish to create so you can choose between a Paperback or Hardback Cover. *Note: the cover type you choose will effect the cost of the book.
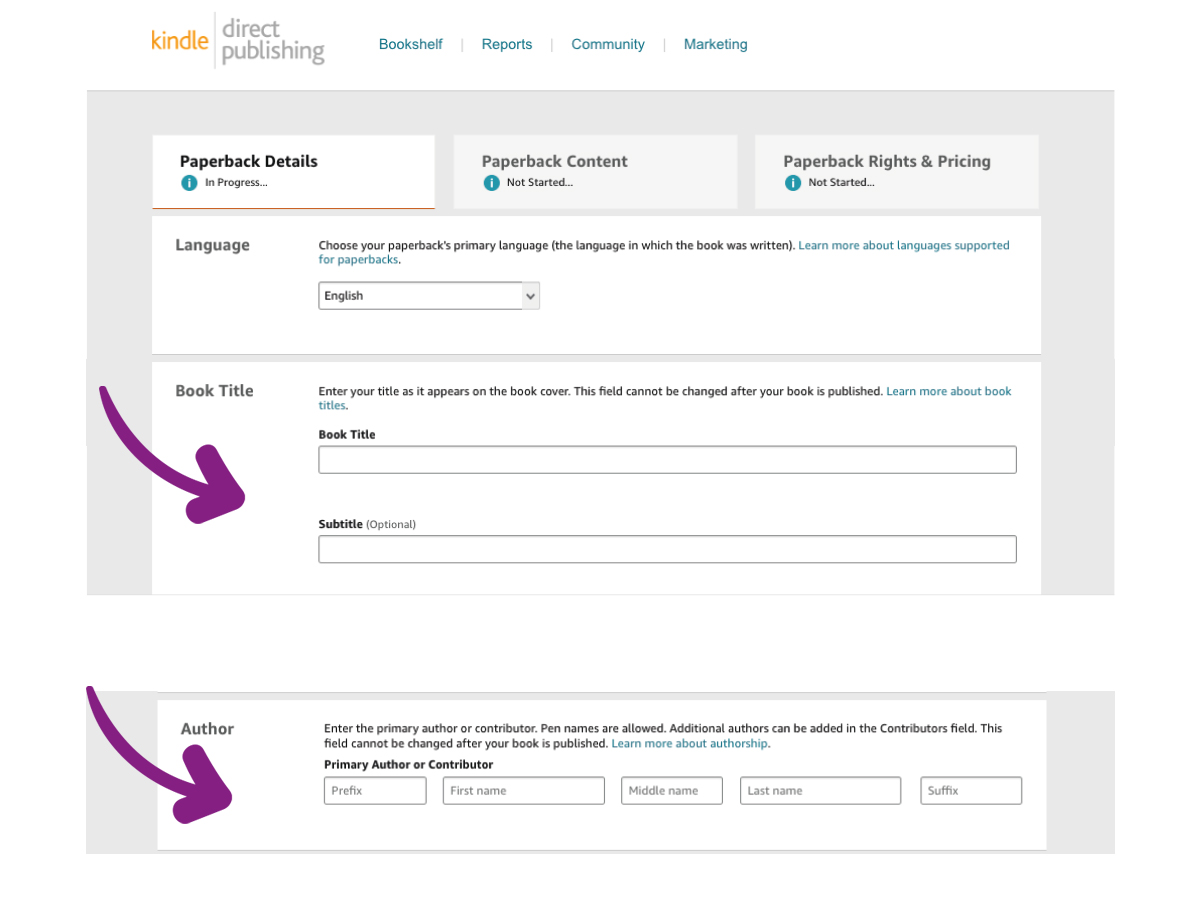
You will need to input your book “Title”.
Keep this as short as possible and include the word that best describes your book such as Notebook, Journal or Planner.
Next input your book “Sub-Title”. This should be as precise as possible. Up to approximately 15 words. Try to include key words that people may use when searching on Amazon for specific type of book and give an accurate short description of your book.
Next you will input the Author Name you wish to publish under. This can be your actual name, a pseudonym or even your business name or a name you have made up to publish your books under. Just make sure you have copyright of the name you use. The author name can, but does not ‘need to’ appear on the book cover.
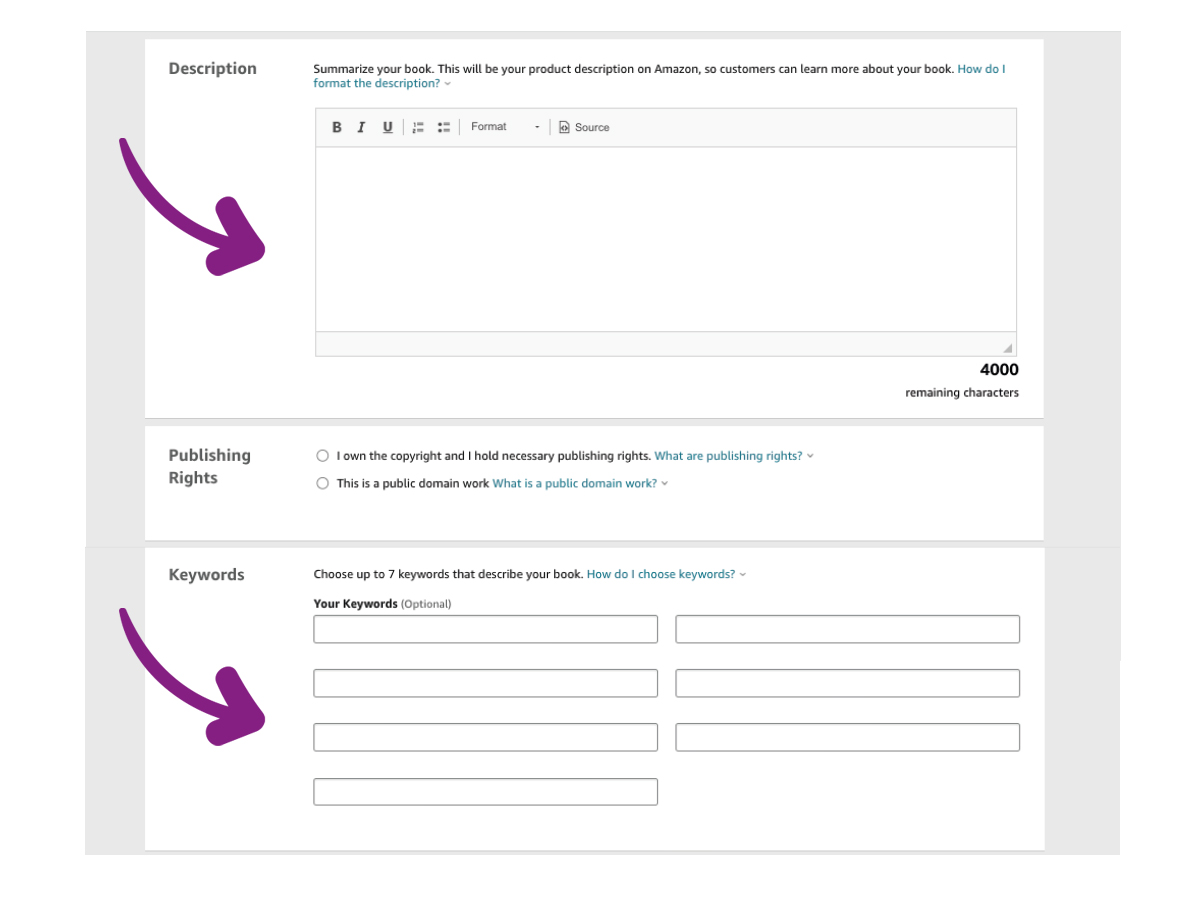
Now is your opportunity to create a comprehensive description of your book to go with your listing on Amazon. This should cover:
• Who is the book for?
• How is the book used and how can it help the user?
• Detailed description of the book
NEXT: KEYWORDS
You can input 7 SEO KEYWORDS. This means words or short phrases that people may use to search for a product matching the description of your book. As well as being specific, also think about general search terms that may present your book to someone who might find it of interest.
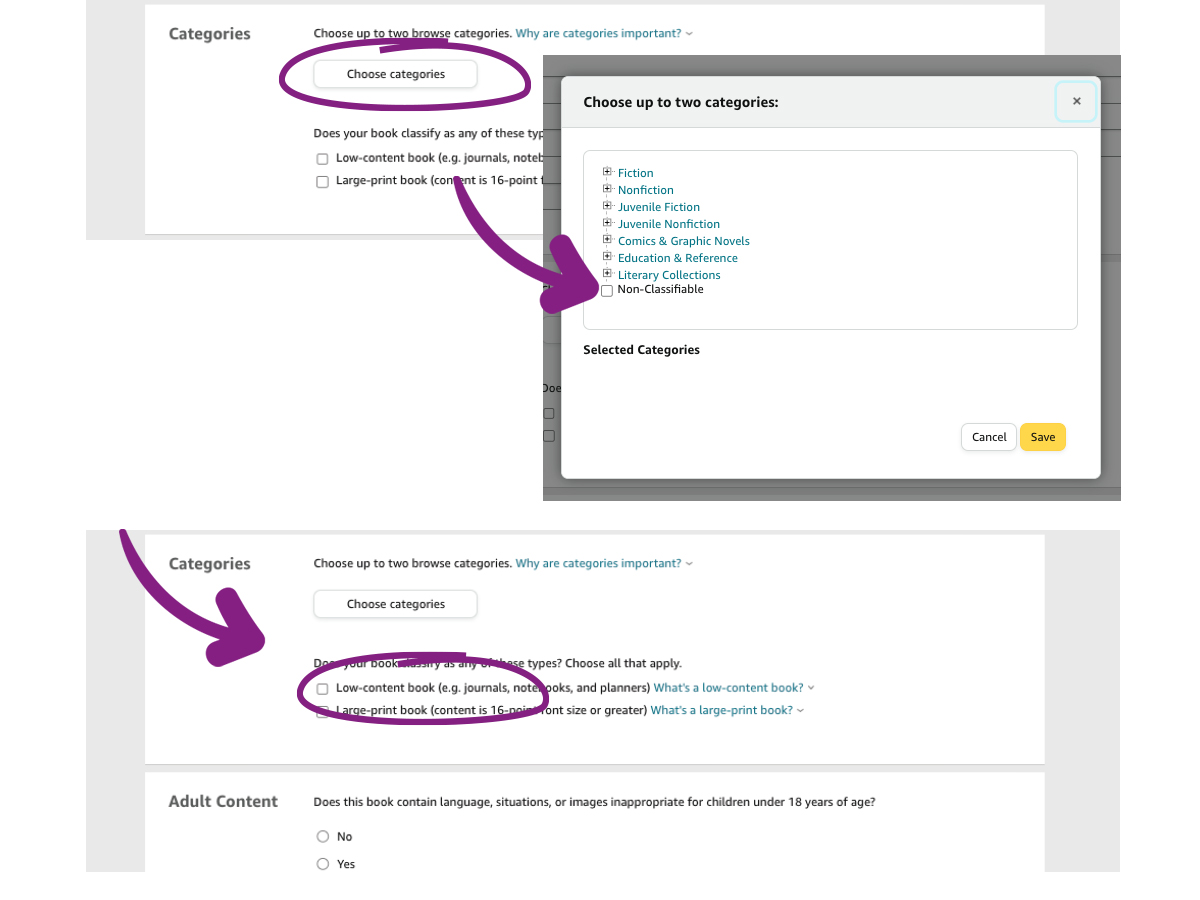
For a low content book such as a Notebook, Journal or Planner, click on the “Categories” tab and choose “Non-Classifiable” from the pop up box options.
Then check the next box to state you have Copyright to publish the book.
press “Save and Continue” at the bottom of the page.
You now move on to the second web form page.
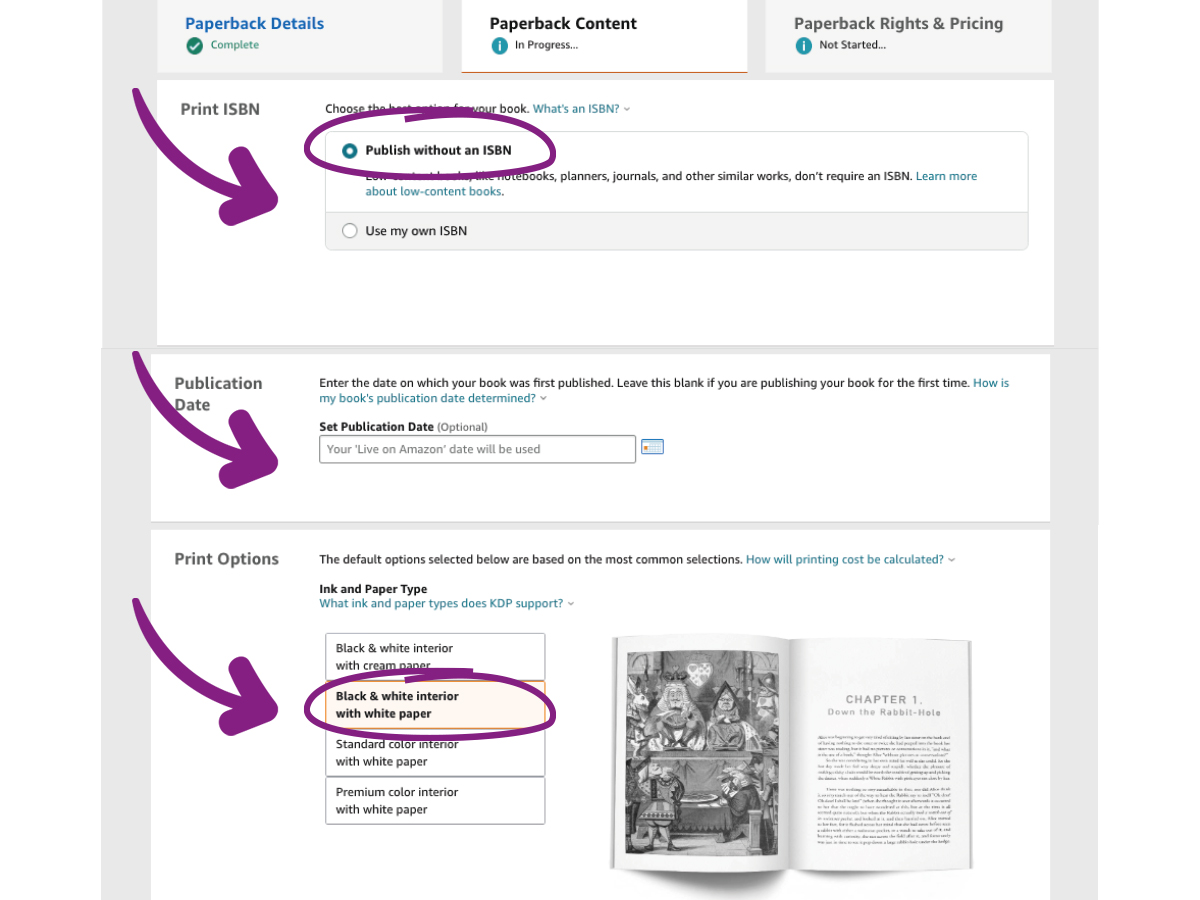
Here you can select Publish Without ISBN as this is not needed for a low content book.
You can select a specific publication date if you wish or just leave this blank and your book will automatically publish as soon as it is approved by Amazon.
Next you select your print options. Click on the option you have chosen for example “Black Print on White Paper” or “Colour Print on White Paper”. *Note: your print choices will effect the cost of your book.
Now you select the book size which you have worked with to create your document.
You select bleed or no bleed. Most simple low content books will have no bleed because you will have kept everything within the “safe print area” margins when creating your content manuscript.
Next you can choose to have a Matte or Glossy Cover for your book.
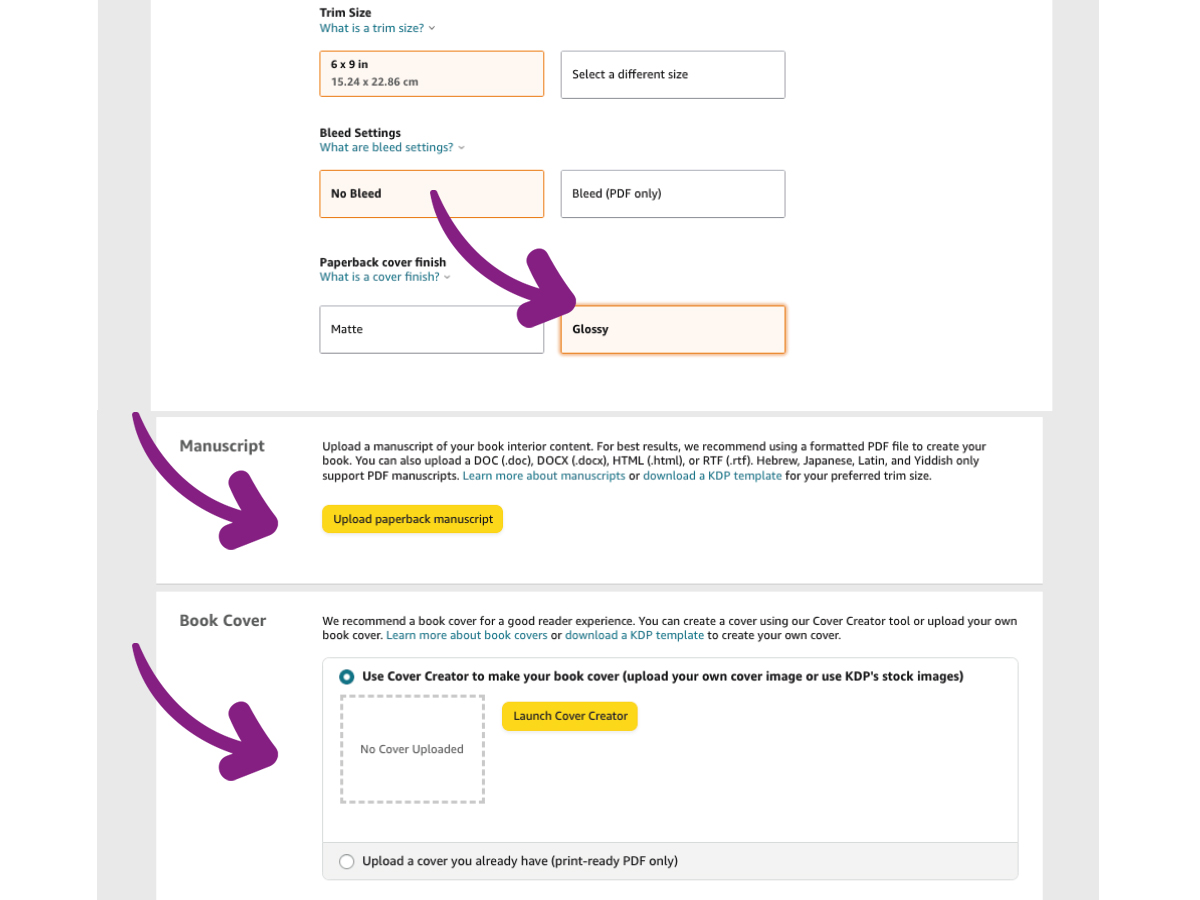
Now comes the time to upload your print ready pdf files.
*Note: You also have the option to use Amazon’s built in cover creator to make your over online at this stage if you have not been able to prepare a cover already.
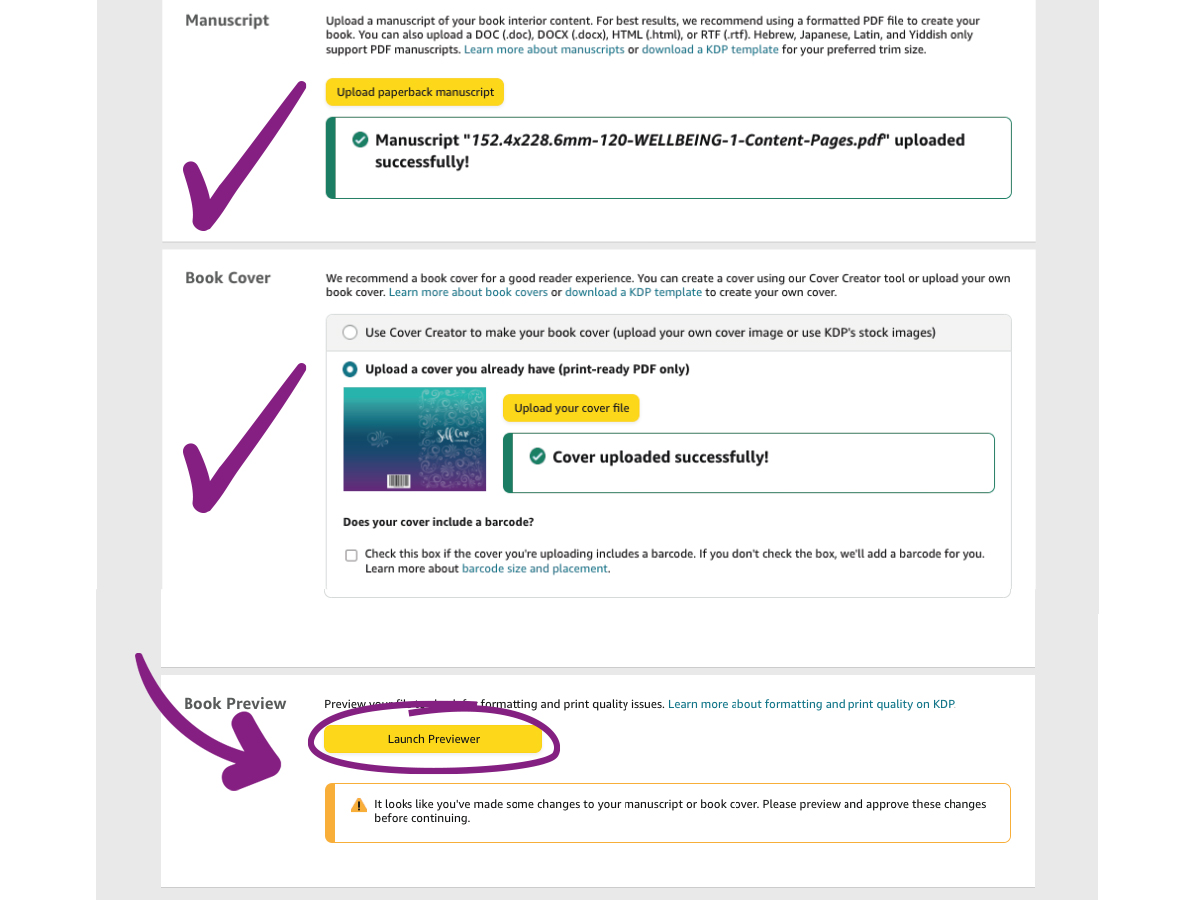
Once you have successfully uploaded your Manuscript PDF file and then your Cover Pdf file, the “Launch Previewer” button will become clickable and you can open up the preview and quality check web page.
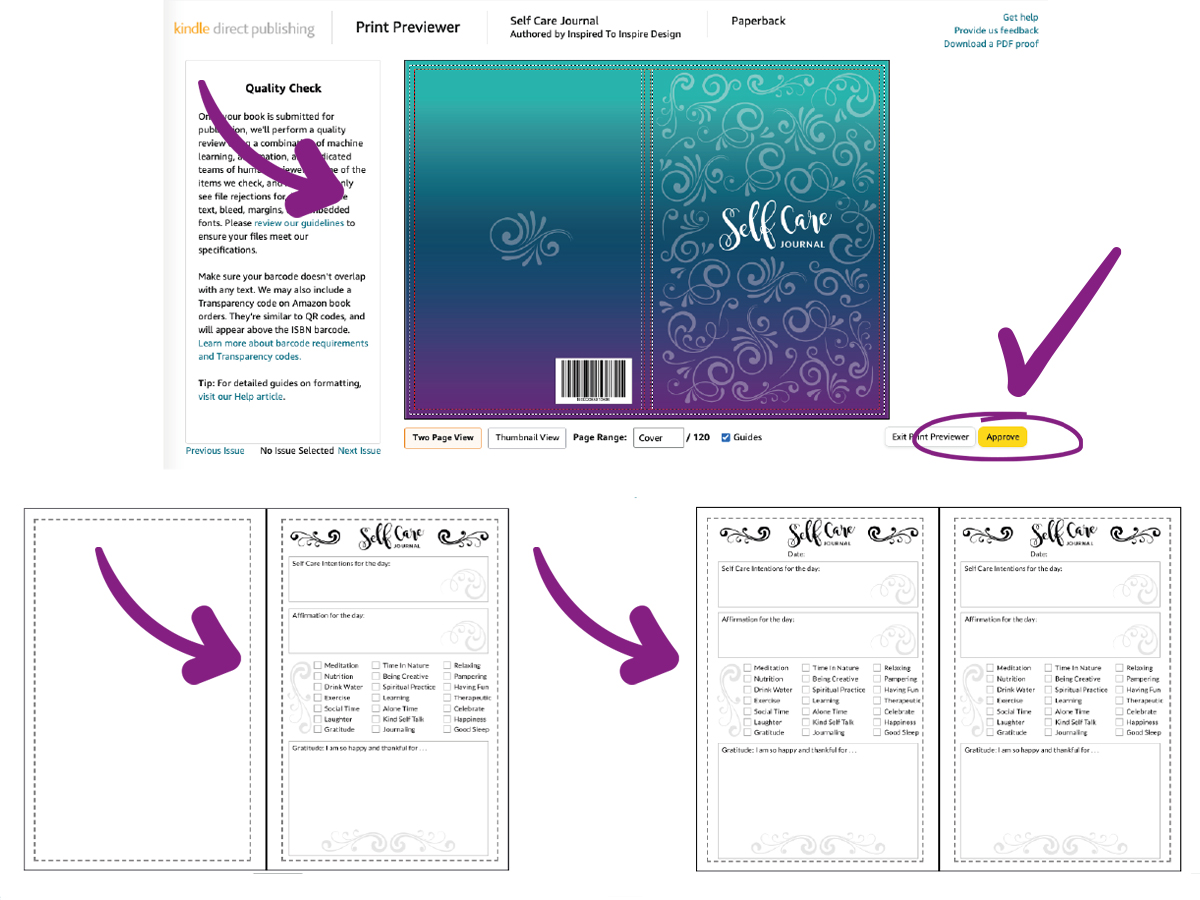
The Previewer will let you flick through the pages of your book to make sure everything is correct and will show you the overlaid guide lines of the safe print area.
*Note, if you have a planner or journal which needs to have “Facing Pages” showing as a double spread as an essential part of the design, then you must ensure you have a blank or alternative page at the very start of the book as “Facing Pages” will not start until page 2. You can see this on the Previewer images.
Once you are happy with your book preview you can press approve.
If you are not happy with it just go back out of the Previewer and press “Save As Draft” so that you can go back to it later and re-upload files after making changes.
If you are happy then press approve and Amazon will do an automatic initial check of your files and come back with any prompts if it finds errors. If everything looks good on the overview it will allow you to press “Save and Continue” which will generate the cost it to produce your book.

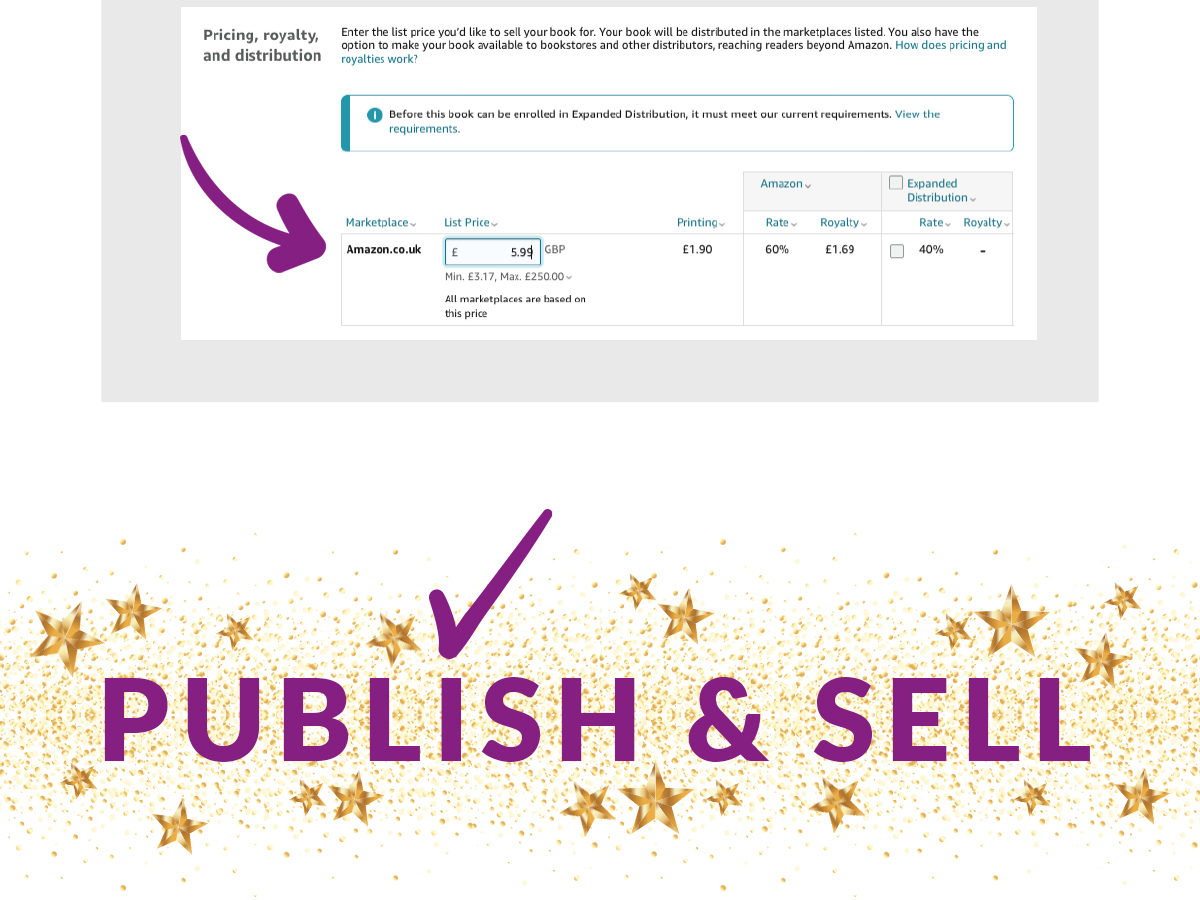
Choose your Primary Amazon site (which reflects the country your are based in and your currency) and then input the amount you want to sell your book for. This amount must be a certain percentage above the cost of printing your book as detailed.
Then you are ready to publish!
You can either press PUBLISH straight away or you can request a “proof” of your book at this stage.
It can take anything from a few hours to a week for Amazon to publish your book. If the quality check team find any issues before it has final approval for publication, you will get an email from Amazon telling you what the issue is and what steps to take to fix it. You can always contact the Amazon KDP LIVE CHAT team for help at any stage of the process if you get stuck.
4. SELL
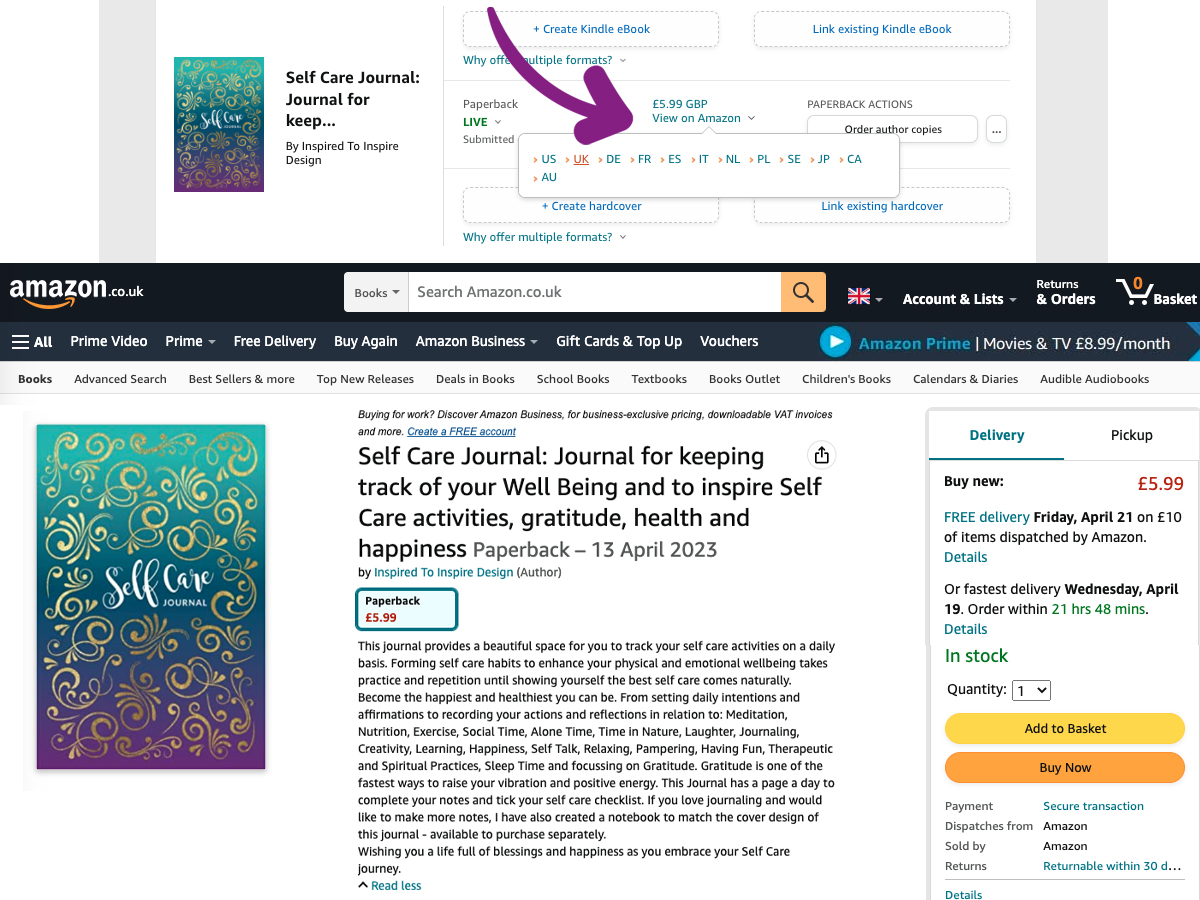
Once your book is published you will get an email notification from Amazon. If you go to your Amazon KDP Bookshelf and look at the details to the right hand side of your book cover image, it will show the status of your book as LIVE meaning it has been published and is available to buy on Amazon Now!
If you take your cursor over where it says “View on Amazon” it will give you a dropdown menu where you can pick out the country you want to see your Live Amazon listing for. Click on that and it will take you to your Sales Page for your book. This is how you can find the link to go ahead and promote and sell your book.
You will get organic sales through searches on Amazon and once you have published your book it is an evergreen income source. The more books you publish, the higher your income stream from this source. If you promote your books yourself as well you are likely to increase sales even further.
Take the next step and PLAN YOUR BOOK NOW!
If you are interested in getting design help from a professional creative designer, click through on the button below to see the exciting offers I have put together to help you. I’d love to help make your ideas a reality so you can set up this fantastic new income stream and get your beautiful Notebook, Planner and Journal ideas out into the world.